This tutorial no longer works with Recalbox 8.0 !
¶ Make your Recalbox shine with Hyperion !
Hyperion is a free and open source project to turn your Raspberry Pi into an Ambilight system !
With Hyperion and Recalbox, you can transform your retrogaming and multimedia system into a magnificent immersive experience!
¶ Description
First of all, we're not talking about using Hyperion with a part of your Recalbox like Kodi.
You'll be able to use Hyperion's features in EVERY RETRO GAME you play on Recalbox!

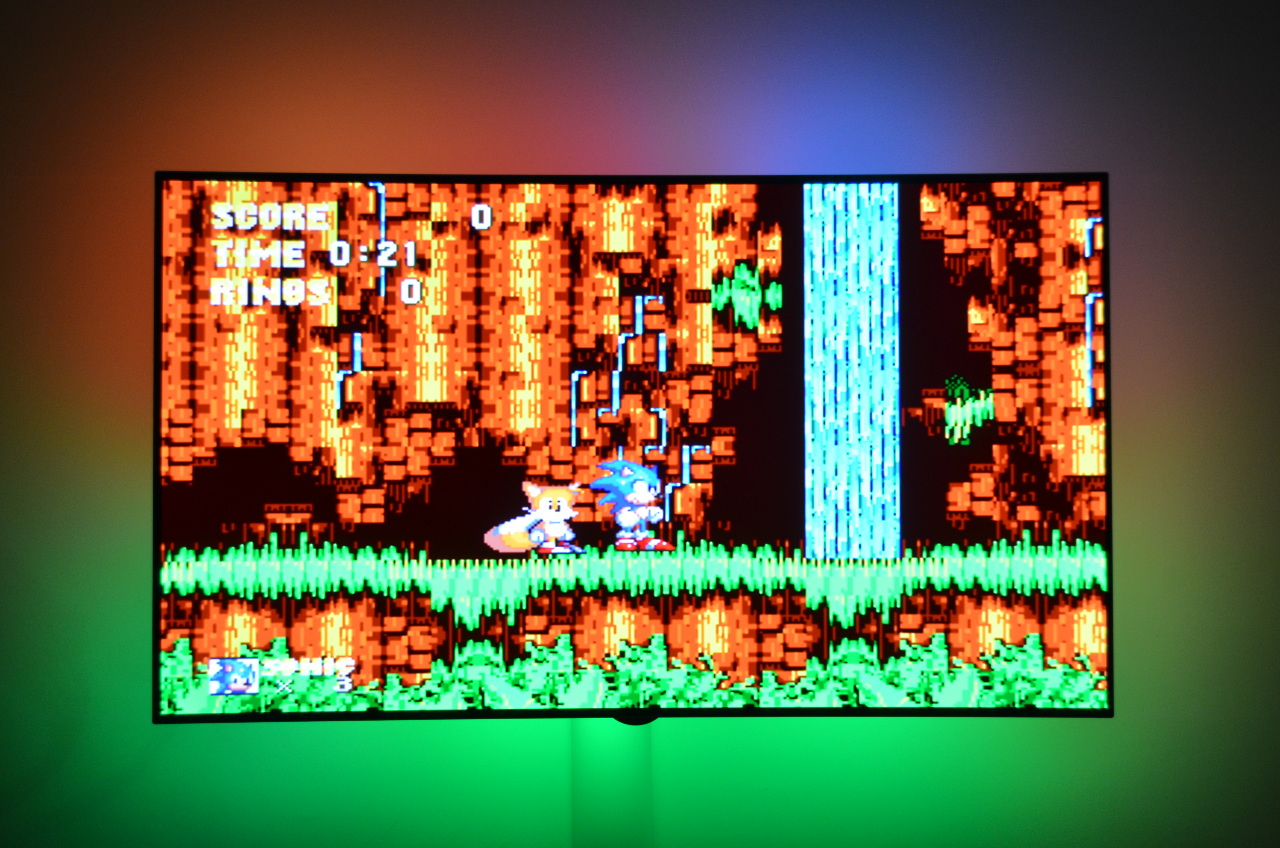
The image you see on your TV (LCD or CRT) will be dynamically extended on the wall using RGB LEDs.
What does it look like? Take a look at Sonic 3 on Sega Genesis:


And on video:
¶ Hardware
Hyperion supports numerous LED strips (see this page) with different protocols:
- SPI : LPD6803, LPD8806, APA102, WS2812b and WS2801
- USB : AdaLight and SEDU
- PWM : WS2812b
The tests were done on WS2812b with PWM and SPI. I've never been able to get PWM to work properly, so we'll describe how to make your Recalbox / Hyperion installation with WS2812b mode in SPI.
This section is missing from the Hyperion documentation, so we'll explain how to use it here.
Support for WS2812b with a wire over SPI has been added by penfold42 with this commit. Thanks.
The following tutorial uses a soldering iron. If you already have one, the rest of the equipment is pretty cheap. But if you want to make something without soldering, see the tutorial here.
¶ What you need
You'll need
- Your Recalbox.
- A WS2812b LED strip.
- A 330 Ohm resistor to put on the data pin.
- Something to cut the strip.
- A soldering iron.
- Wires or connectors to connect the LED strip.
- A level shifter to change the data voltage to 5V, or a voltage regulator to reduce the VCC of the LEDs.
- DuPont jumpers to easily connect the wires to the Raspberry Pi.
- A 4A 5V power supply.
Visit kubii.fr to find everything you need.
Of course, if you want to save money you can:
- Solder directly (no connectors or DuPont)
- Use a 3A power supply.
I tested my 220 LED Hyperion strip with an Aukru 5V 3A and it worked almost fine, but when all the LEDs are white, the end of the strip is a bit yellow...
¶ Wiring
¶ LEDs
Measure the edges of your TV and cut 1 strip per edge according to this measurement.
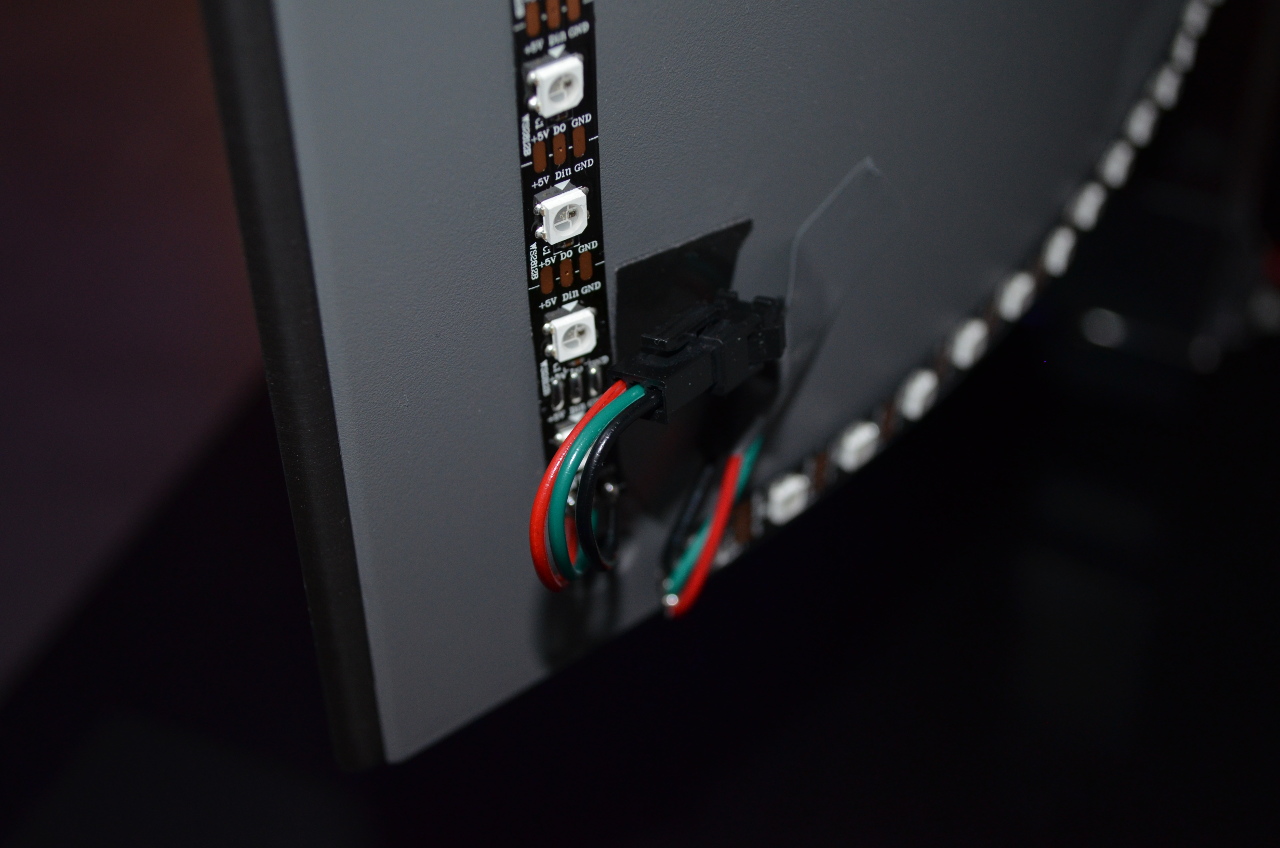
Solder the strips together OR solder connectors to the strips. Follow the arrows on the strip to find out which connector to use (IN or OUT).
Here's a preview of the result:

¶ System
To allow the Raspberry Pi to send data to the LEDs, you have the following options:
- Reduce the LED voltage to 4.7V using a converter
- Adjust the GPIO signal to 5V
¶ Voltage regulator
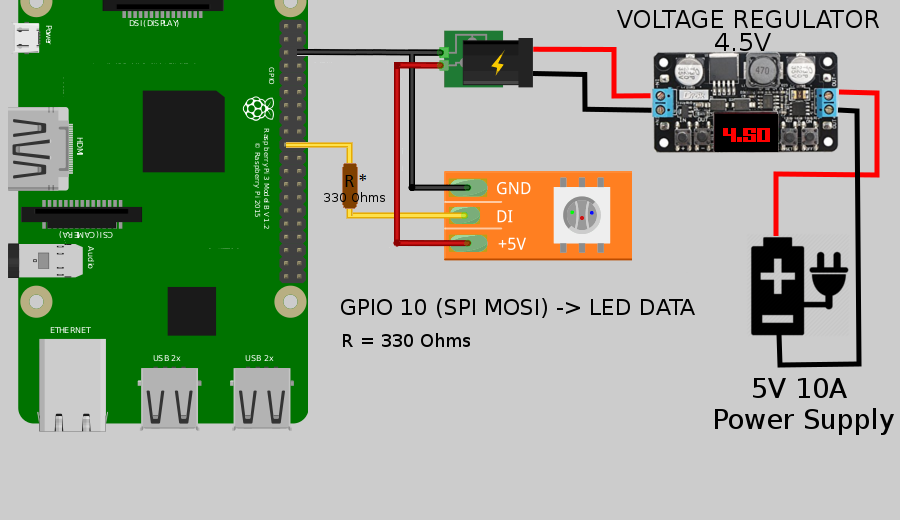
If you are on a Raspberry Pi 2 or 3, you have more GPIOs but the placement remains the same. The Raspberry Pi is connected to its own power supply and to the LED power supply ground. The Raspberry Pi sends the data via the SPI MOSI GPIO to the LED data cable. The regulator is connected between the LEDs and their power supply.
¶ Level shifter (not tested)
If you choose to regulate the GPIO voltage, use the diagram above, remove the regulator and connect the level shifter between the MOSI GPIO and the LED data cable.
¶ Configuration
Hypercon is a graphical interface that allows you to configure your Hyperion installation and create the configuration file to be placed on the Recalbox.
¶ Download and start-up
Download and start Hypercon by following the official tutorial.
You can find many resources on Hypercon configuration on the Hyperion documentation.
¶ Configuration for Recalbox
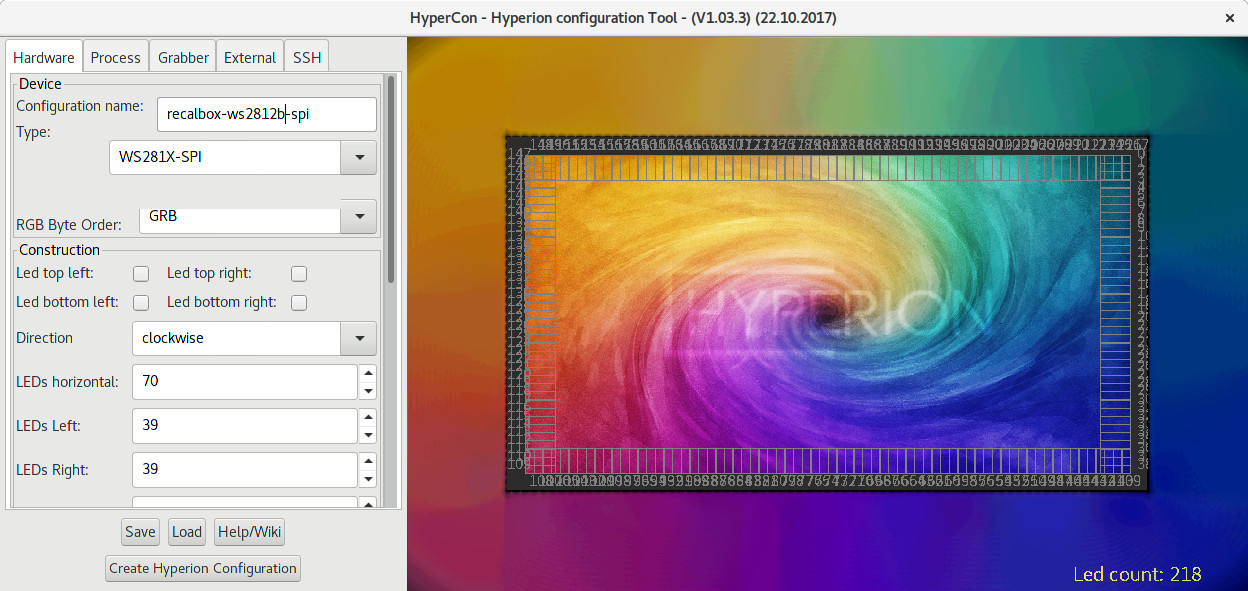
Here's how to configure Hypercon for your Recalbox and WS2812b in SPI mode:
- Hardware
- Type -> WS281X-SPI
- RGB Byte Order -> GRB
- Construction and Image Process -> configure depending of your installation
- Blackborder Detection -> Enabled
- Threshold -> 5
- mode -> osd
- Process
- Smoothing
- Enabled -> True
- Time -> 200ms
- Update Freq -> 20
- Update Delay -> 0
- Smoothing
- Grabber
- Internal Frame Grabber
- Enabled -> True
- Width -> 64
- Height -> 64
- Interval -> 200
- Priority Channel -> 890
- GrabberV4L2
- Enabled -> False
- Internal Frame Grabber
- External
- Booteffect / Static Color -> configure the boot effect you like here!
Then click on the Create Hyperion Configuration button. Save the json file in hyperion.config.json.
Copy this file to your recalbox in the location /recalbox/share/system/config/hyperion/
¶ Enable the Hyperion service in recalbox.conf
- Simply enable Hyperion in recalbox.conf by changing the line
hyperion.enabled=0tohyperion.enabled=1. - Edit the
recalbox-user-config.txtfile on the boot partition and add the linedtparam=spi=on:
echo 'dtparam=spi=on' >> /boot/recalbox-user-config.txt
- Restart your Recalbox.
¶ Enjoy the rainbow
You've got a fully functional Ambilight system! Try out retro games, films and anime with Kodi and let the beauty of the colours enhance your multimedia experience!
