¶ First steps
¶ First start
After installation, the first thing to do is to connect your box with Recalbox to your TV via the HDMI cable. To power and start your Recalbox, simply plug in the micro USB or USB-C power cable.
Many controllers work directly when you first use Recalbox. However, if you want to configure a USB controller directly, connect a USB keyboard, ... please see the Configuring a controller section.
¶ Set Recalbox to your language
On the system selection screen, press START. Choose SYSTEM SETTINGS > LANGUAGE, select your language and go back. Recalbox will tell you that it must restart. Once it has finished booting up, the menus will be completely in your language.
¶ Stop Recalbox
On the system selection screen, press SELECT and choose SHUTDOWN SYSTEM. Wait until the Pi's green/orange LED stops flashing so as not to damage the microSD card, and once it stops flashing, unplug the power cable.
¶ Default games
Recalbox comes with a few royalty free games (homebrew) and/or demos for several systems.
¶ Configuring a controller
¶ Add and configure an USB controller
You can add USB controllers to Recalbox. Most models are compatible (see the compatibility list).
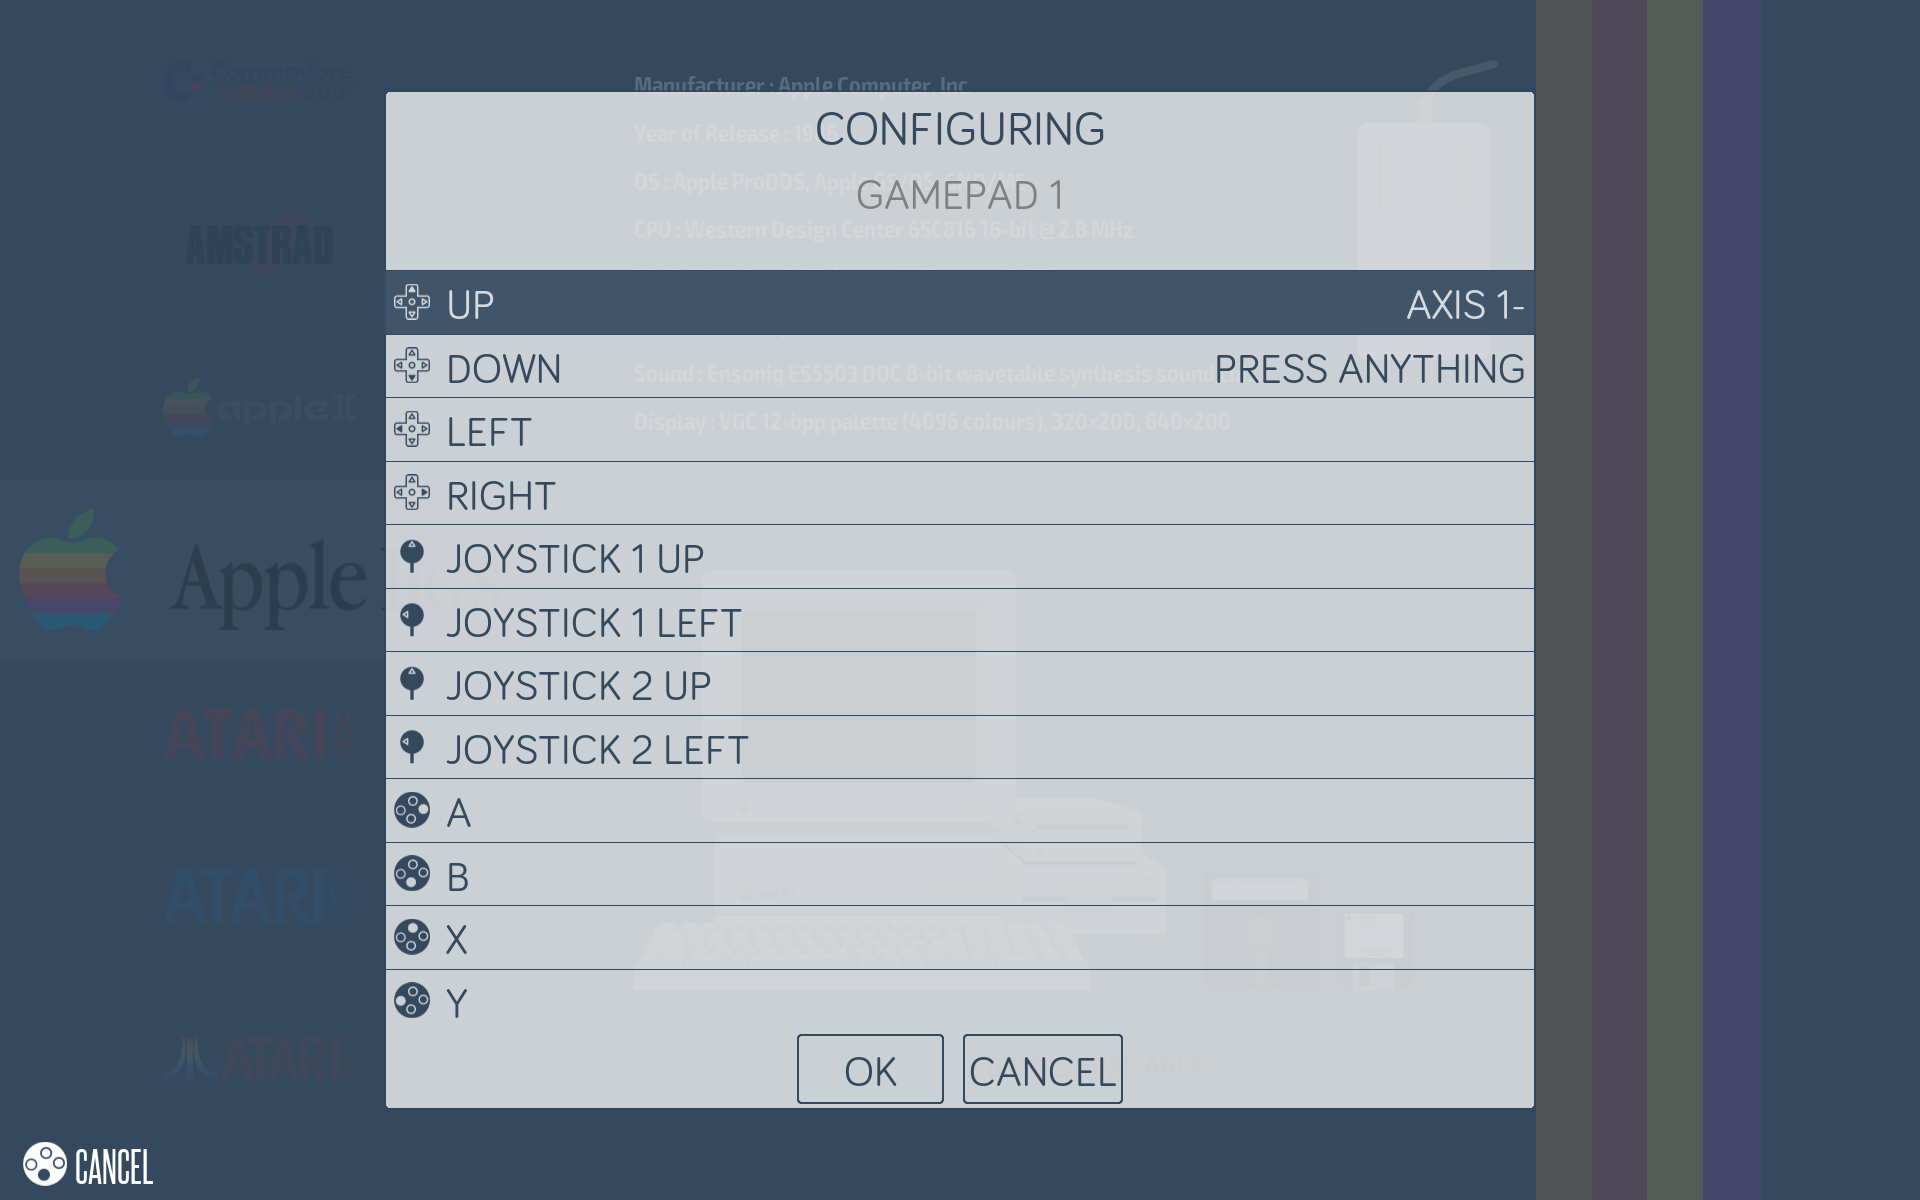
After connecting your USB controller (or pairing your Bluetooth controller), press START with a previously configured controller. Select CONTROLLER SETTINGS and follow the instructions.
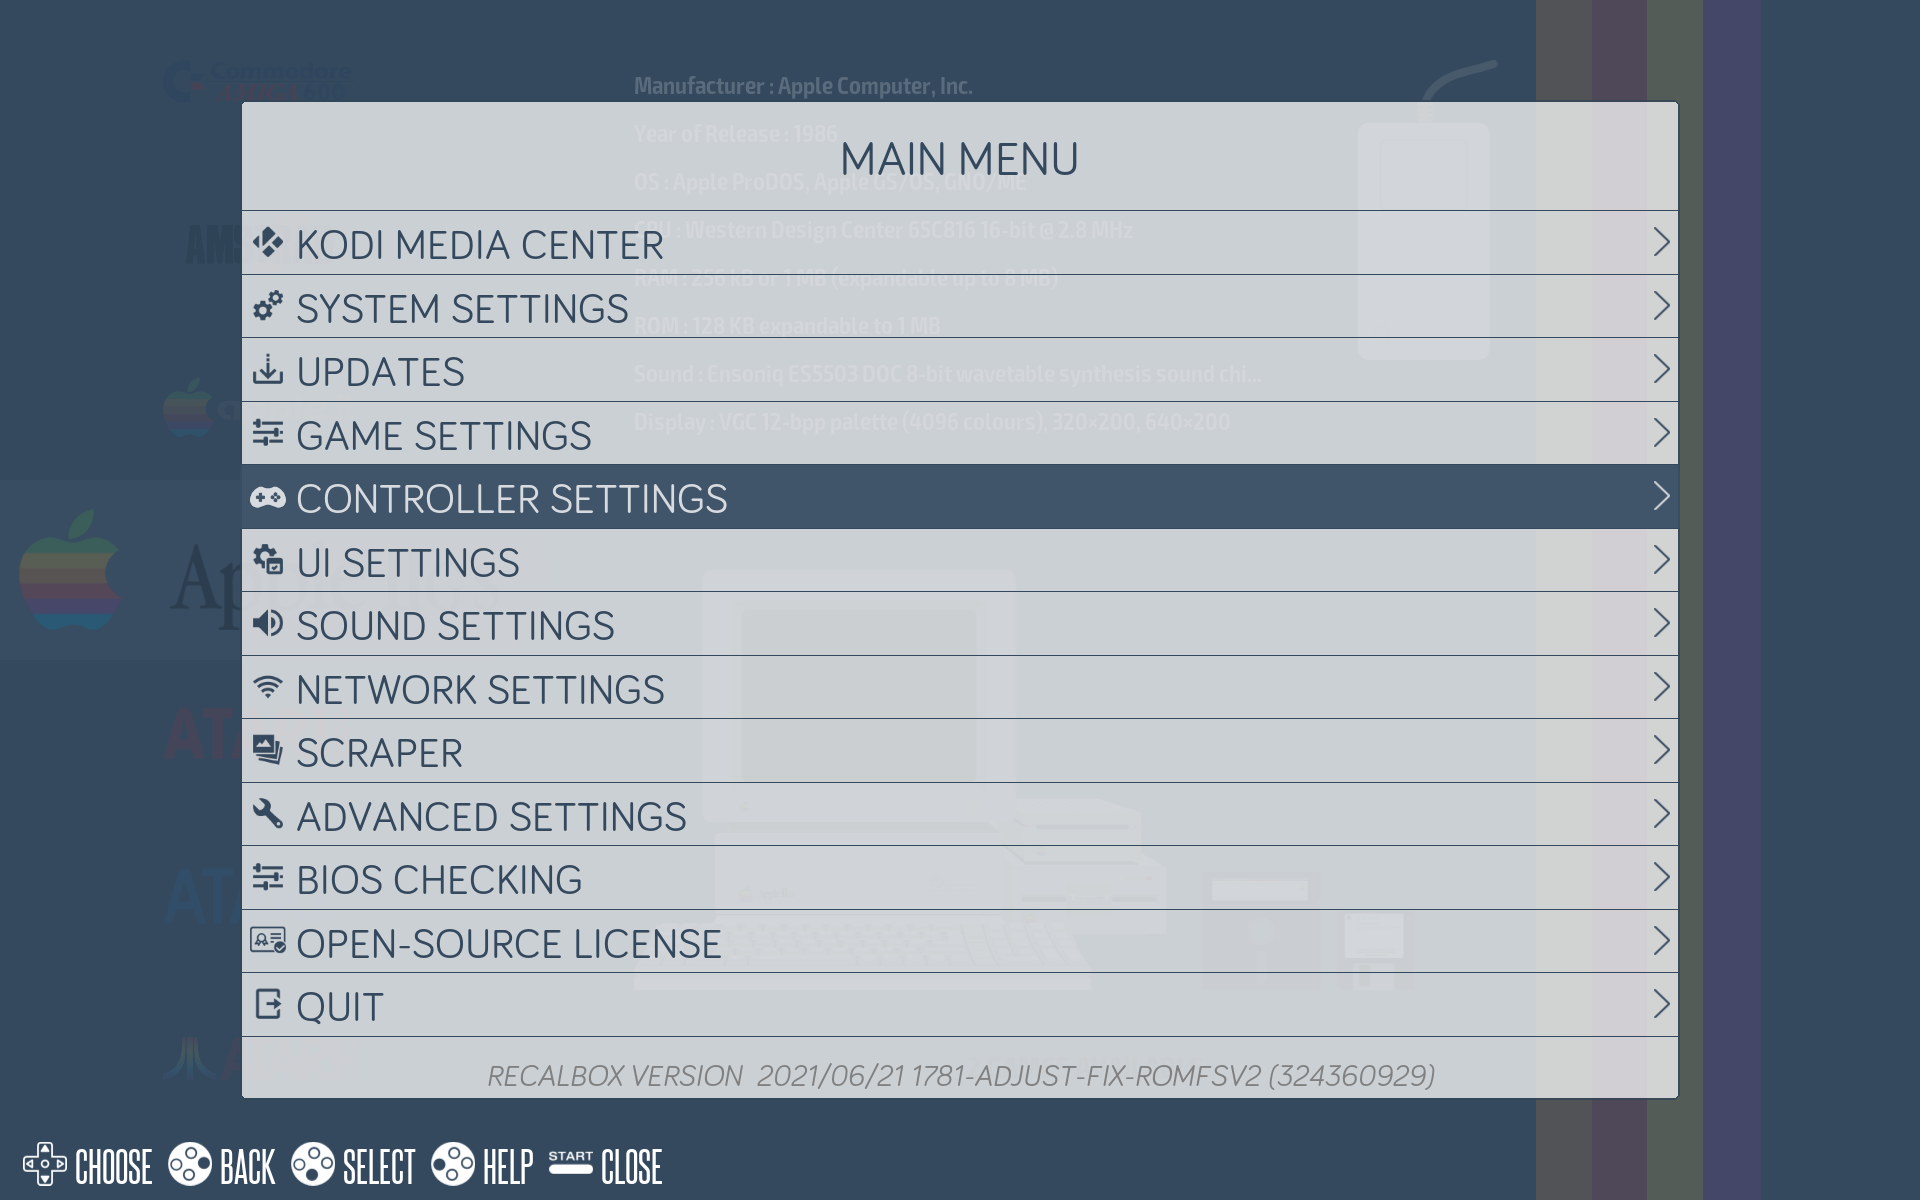
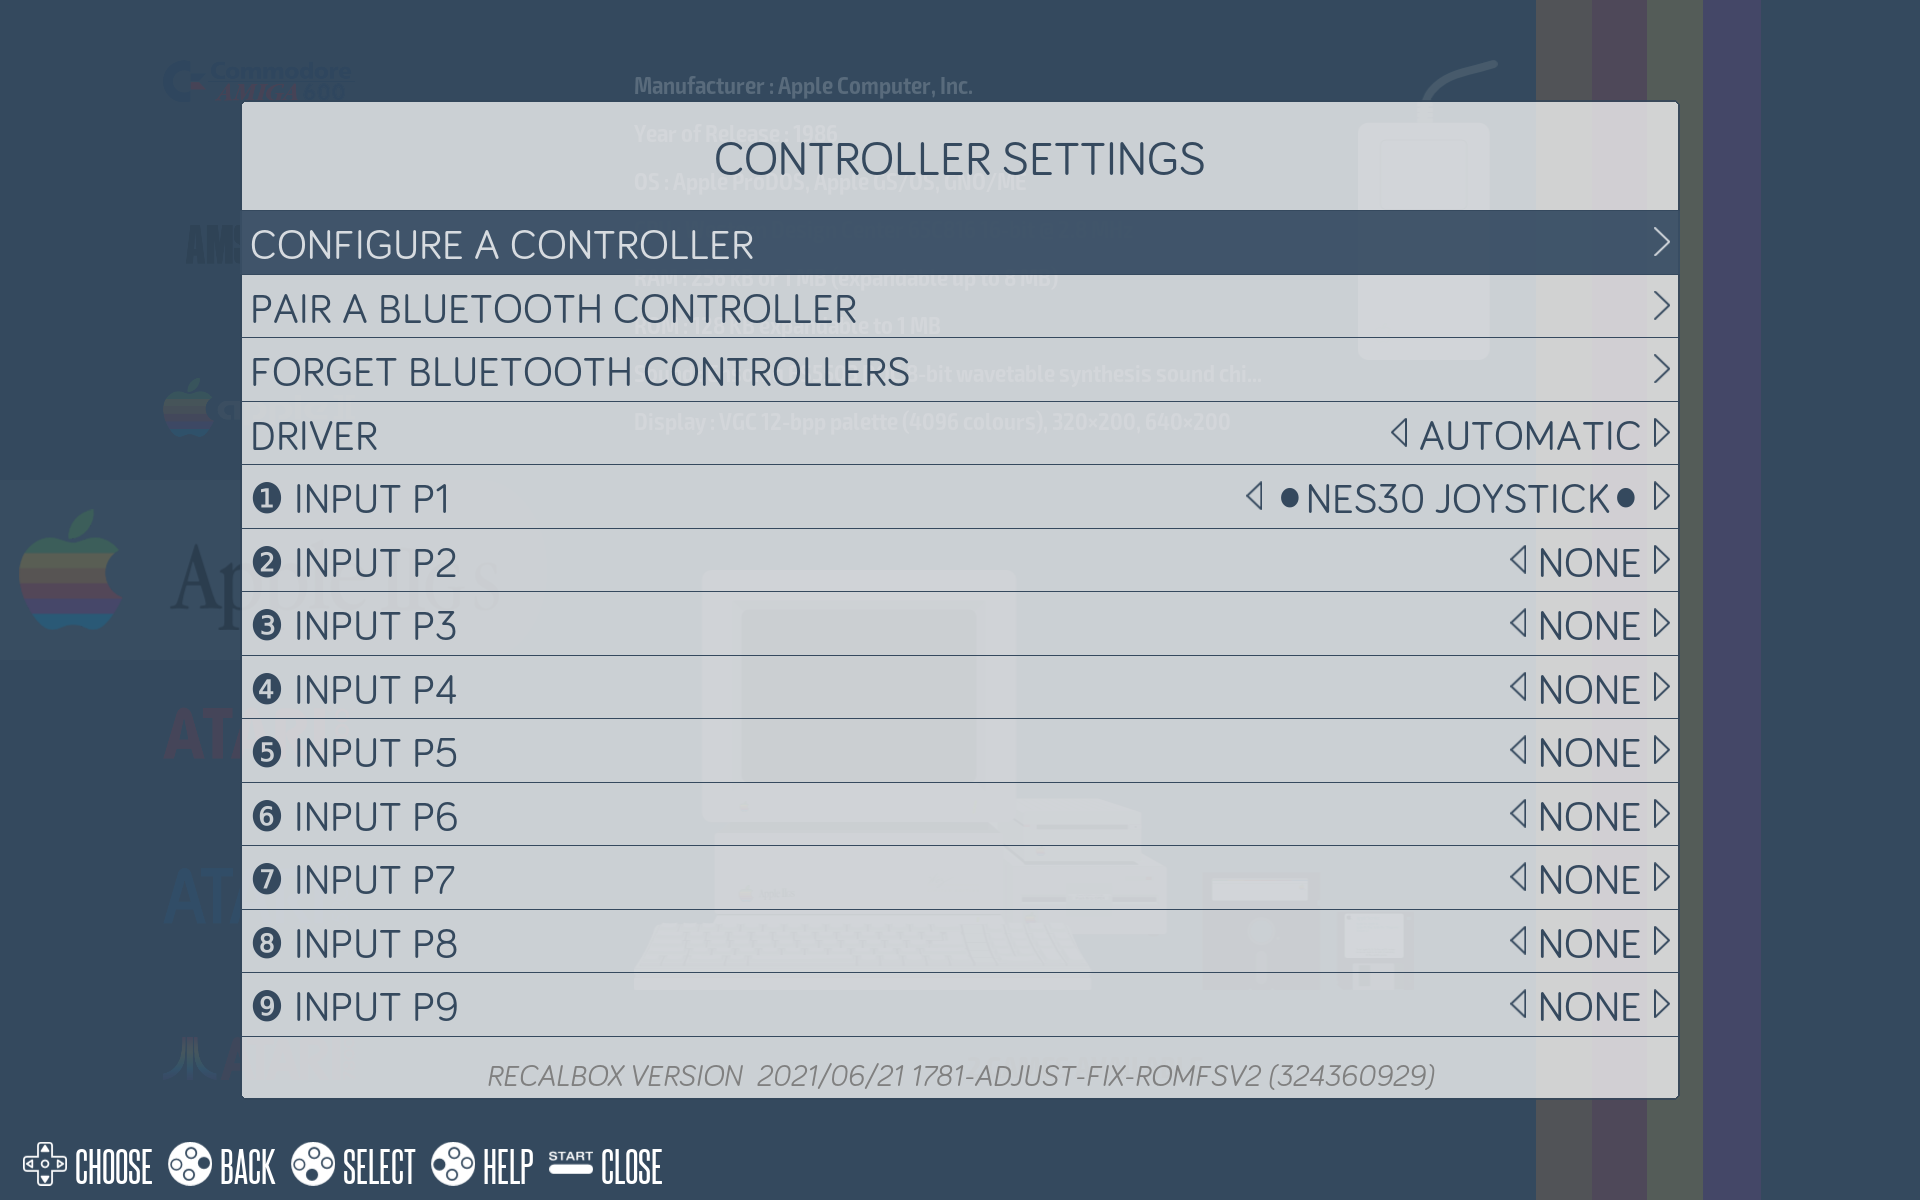
Select CONFIGURE A CONTROLLER and follow the instructions.
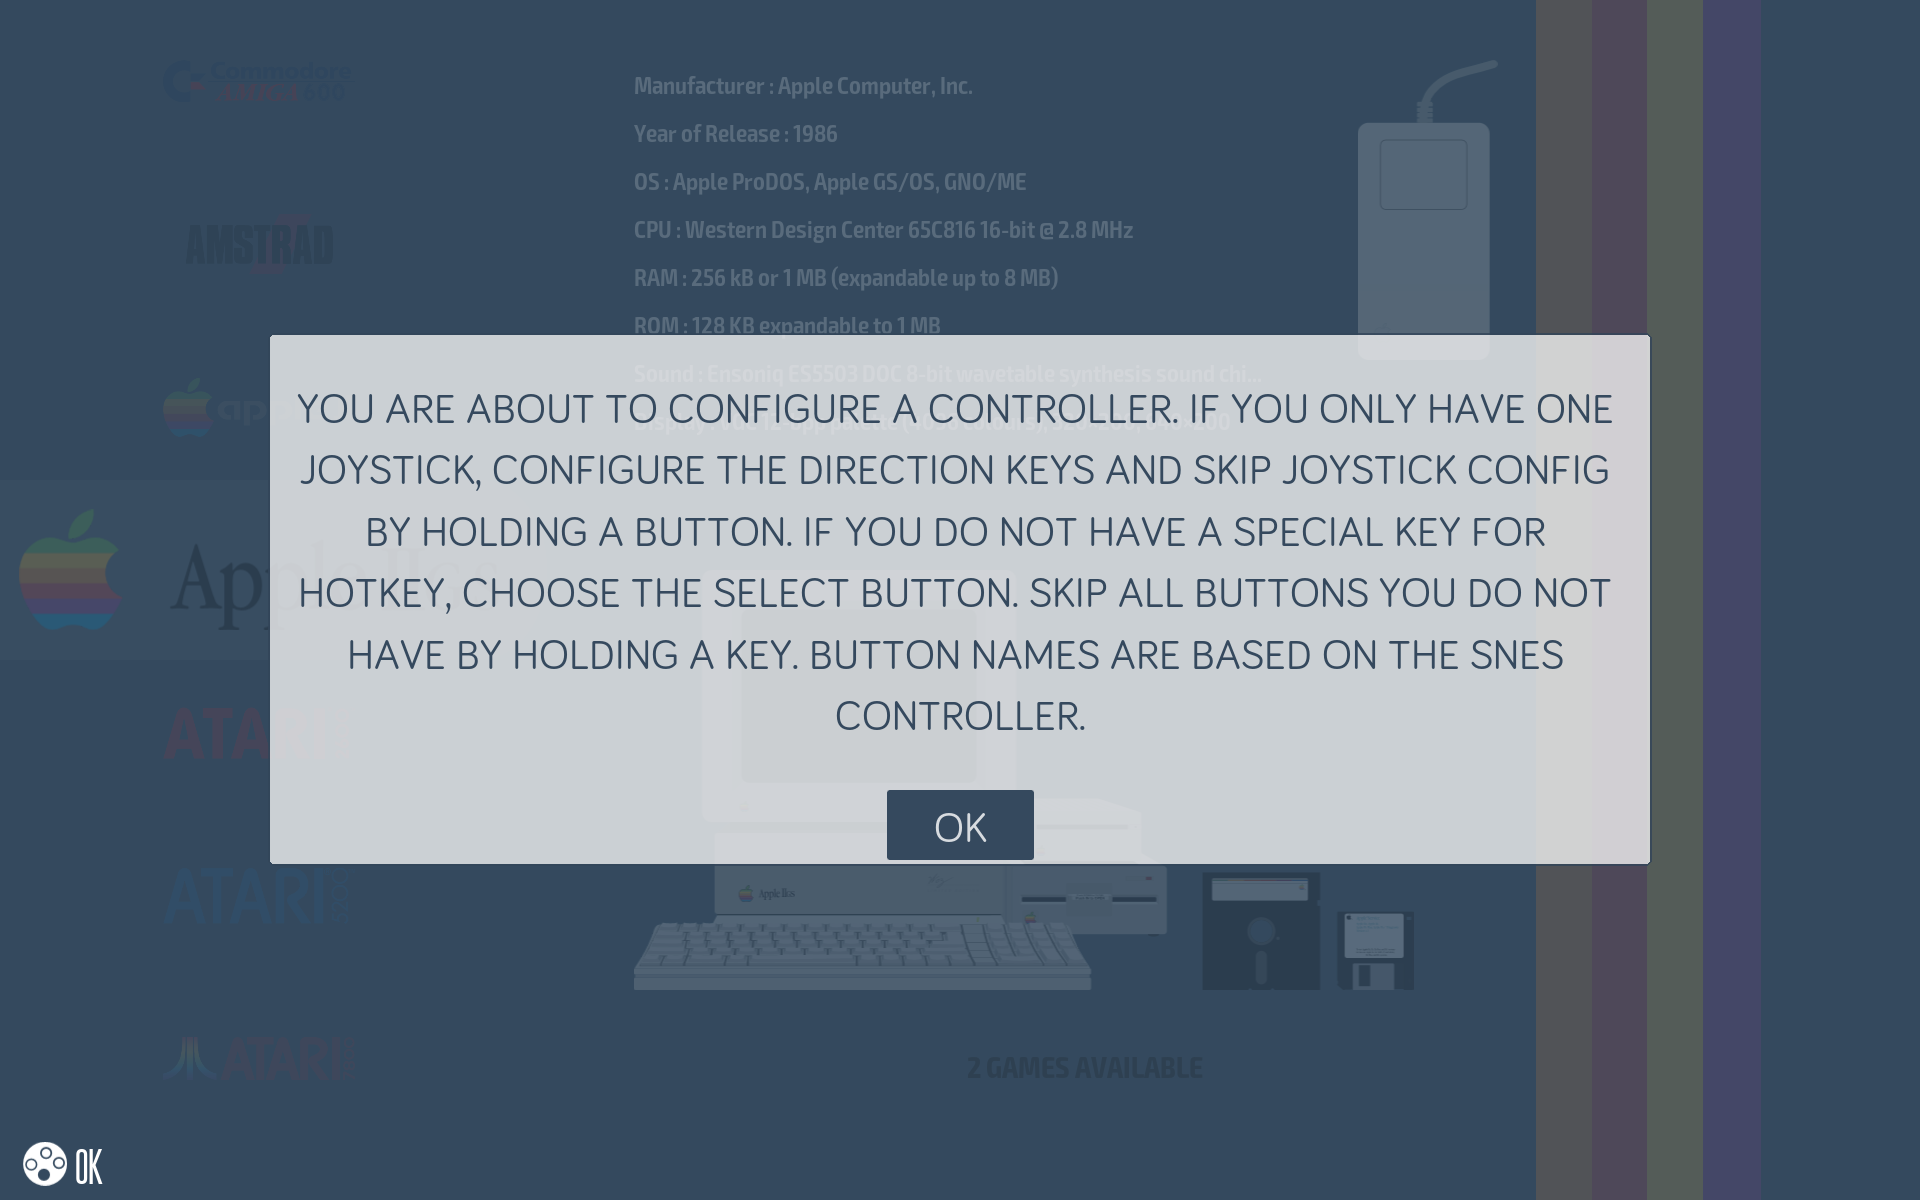
Press a key to start the configuration.
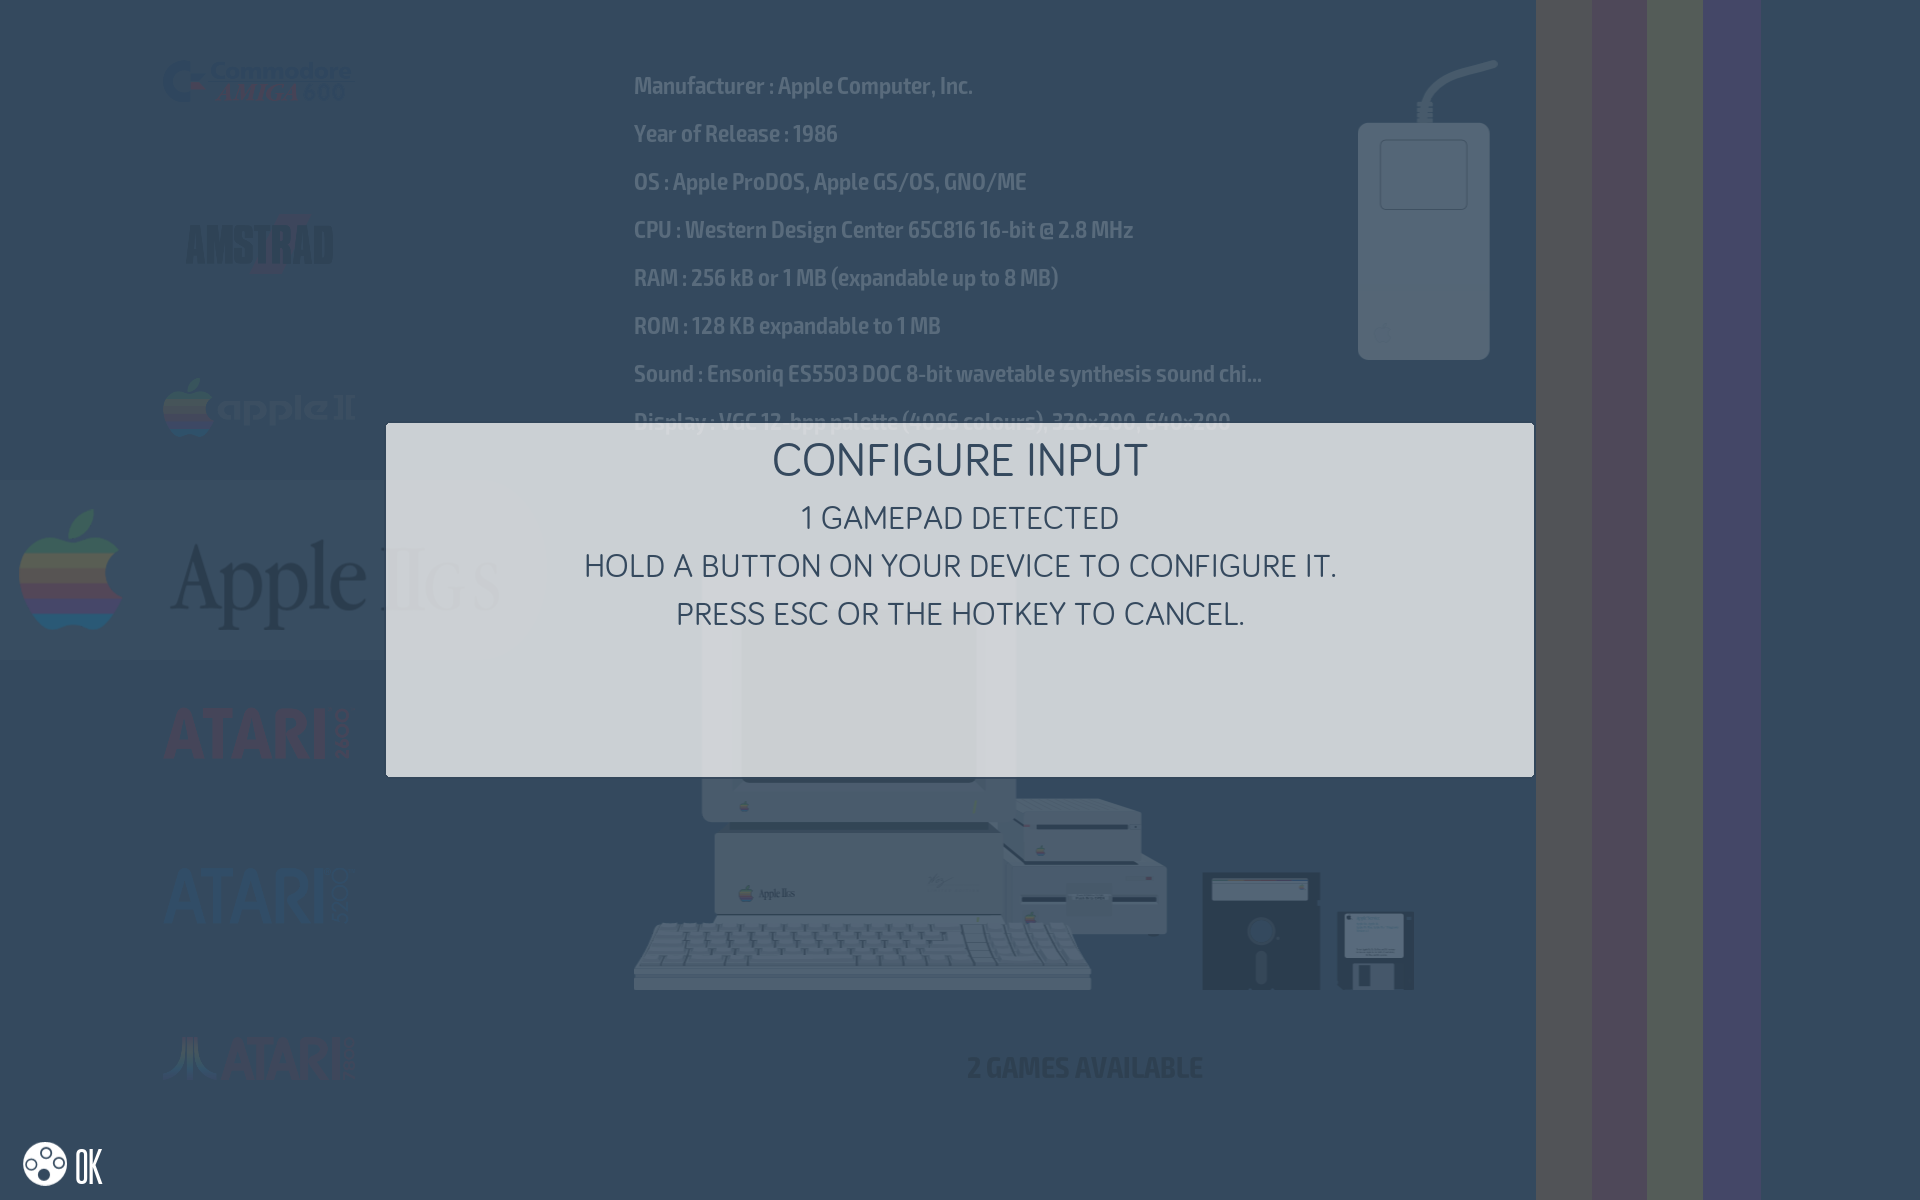
Hold down any button on the controller to configure it.
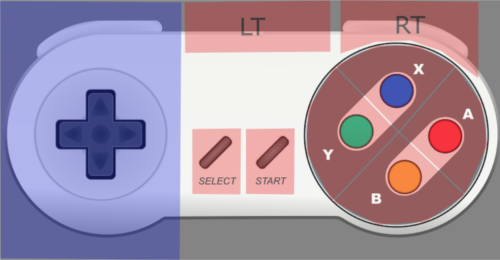
Now you can assign buttons to your controller. The names used to assign the buttons are those of the Super Nintendo controller:
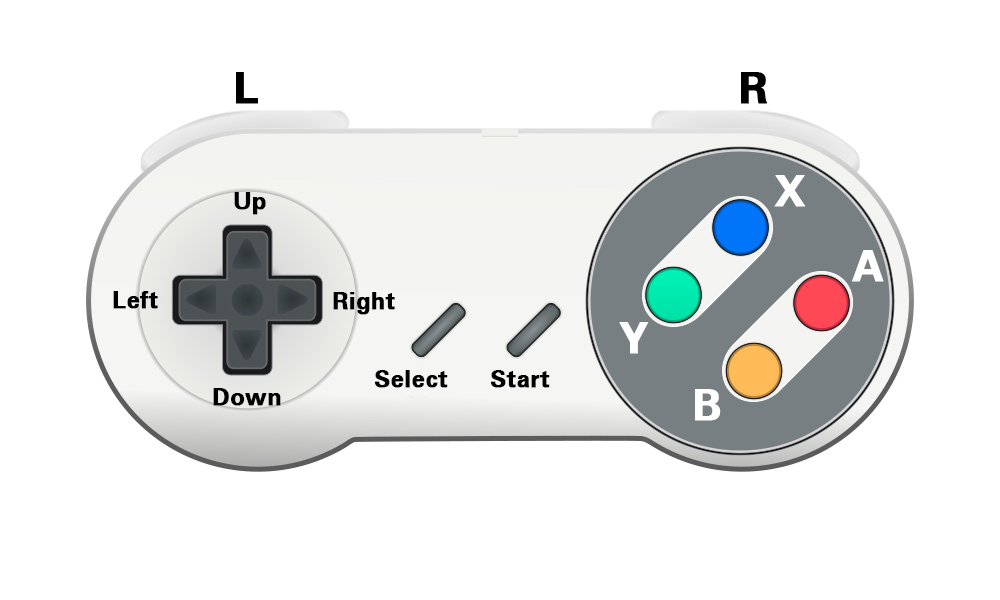
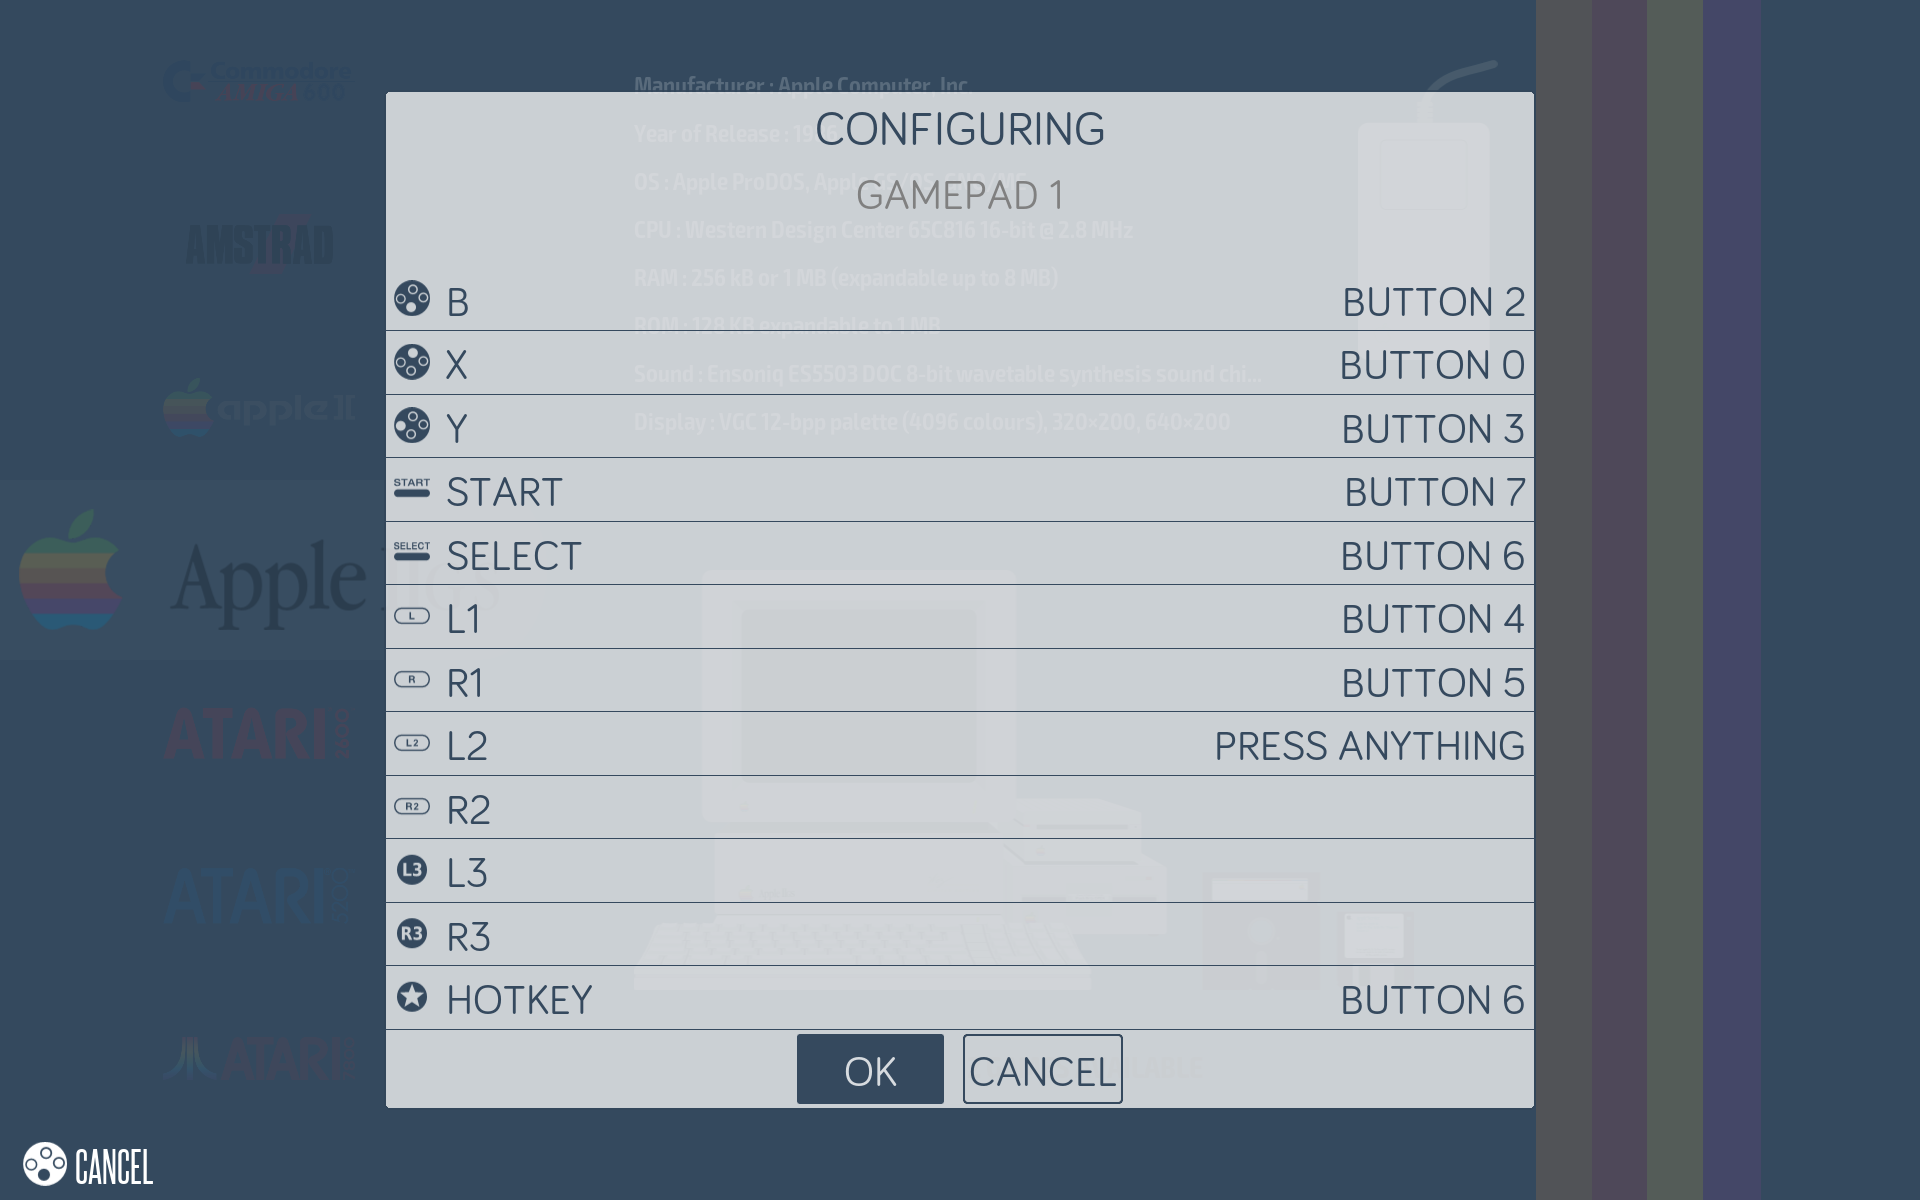
The L1, R1, L2, R2, L3 and R3 buttons are based on the Playstation controller.
HOTKEY
The last button to configure, HOTKEY, is the one that will be used to activate the special-commands when you are in an emulator:
For Xbox 360 and Xbox One controllers, the Hotkey button is assigned to the
HOMEbutton.
For PS3 and PS4 controllers, the Hotkey button is assigned to thePSbutton.If there is no dedicated button or one has not yet been assigned, it is recommended that you assign Hotkey to the
Selectbutton.
To skip any button (except Hotkey), press the
Downkey to move to the next button.
For 6-button controllers (SNES, arcade, ...), the buttons are assigned in correspondence with the SNES controller (see above).
For 2-button controllers (NES, PC Engine, Gameboy, ...), the assigned buttons areAandB.
¶ Assigning the controller
- Back on the setup screen, you can assign the controller to a player.
- Select
INPUT P1to assign a controller.
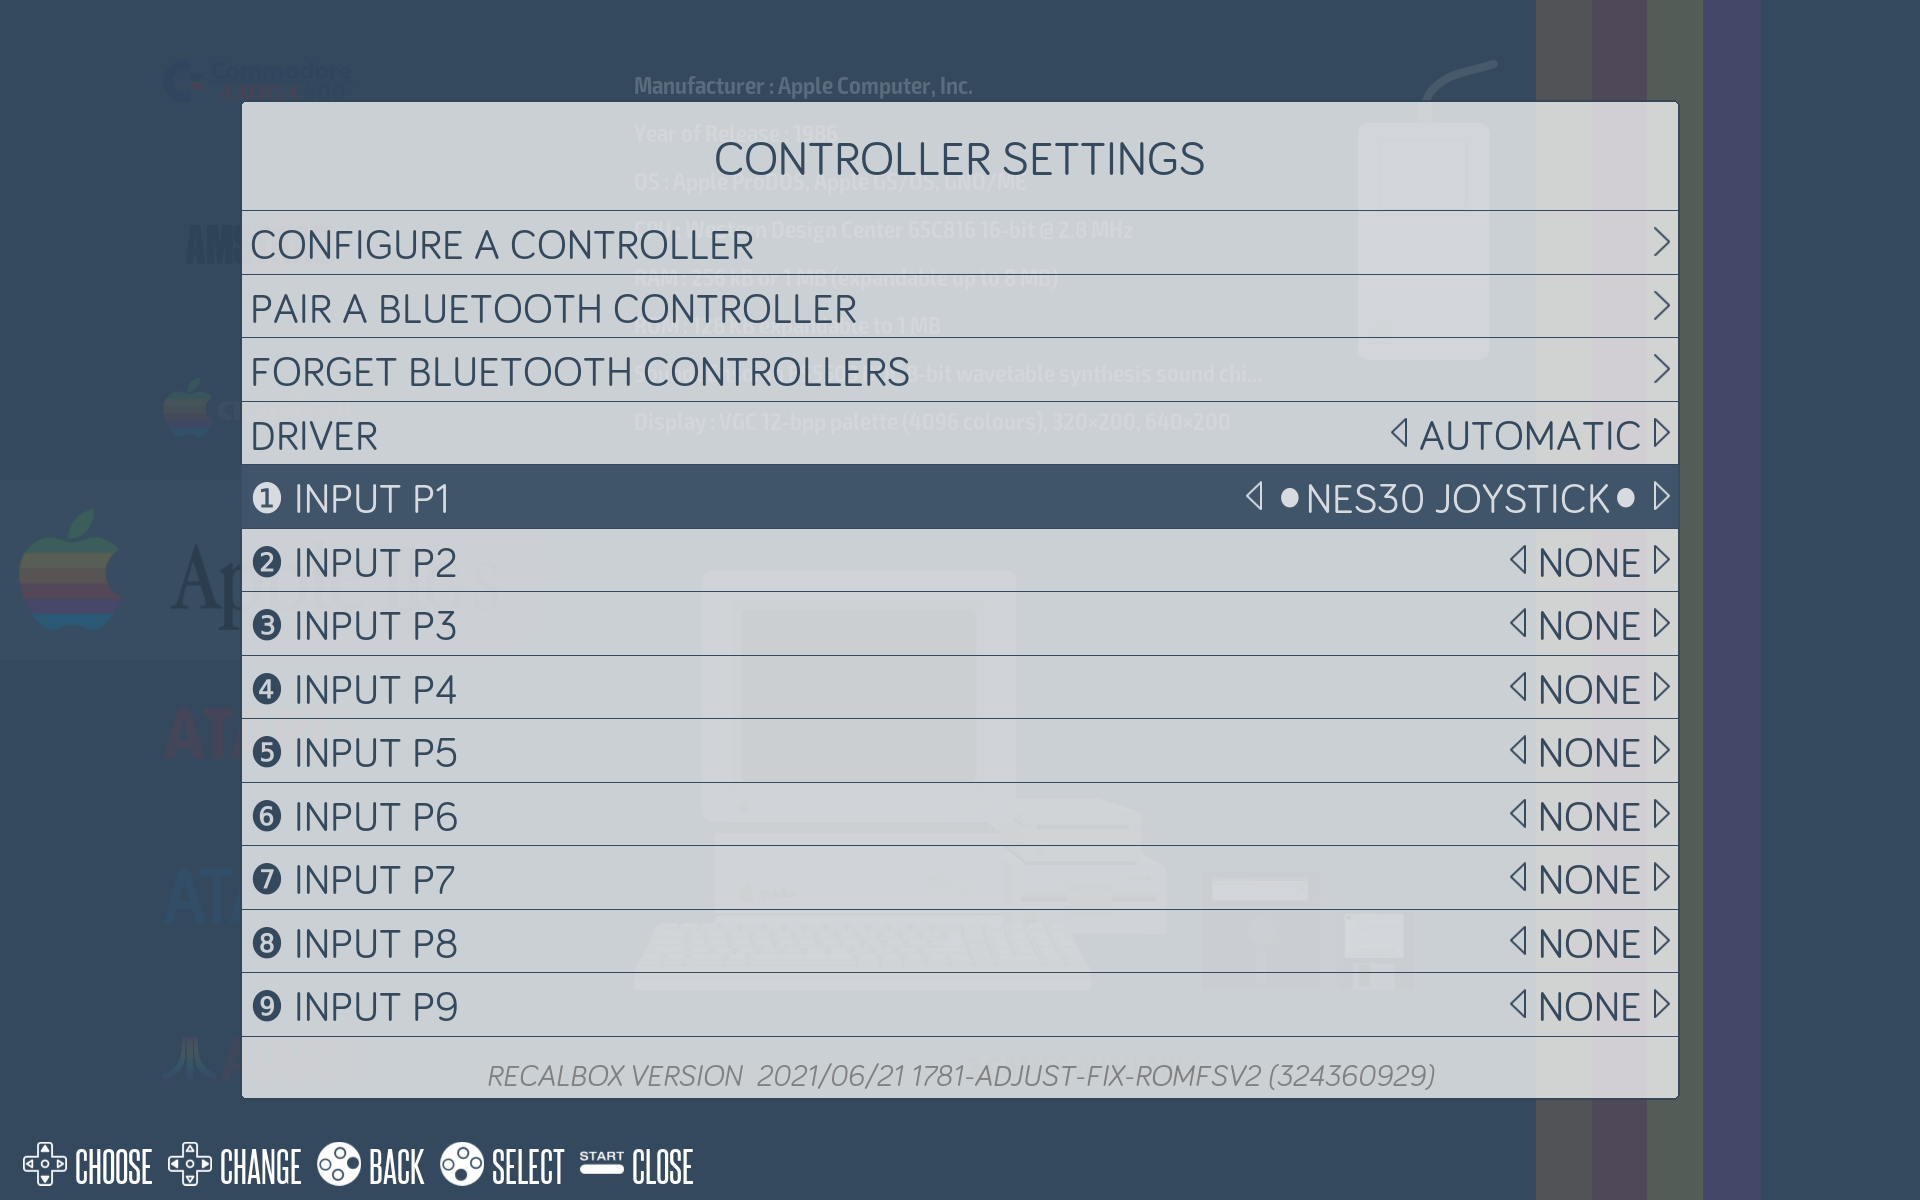
- Select a controller.
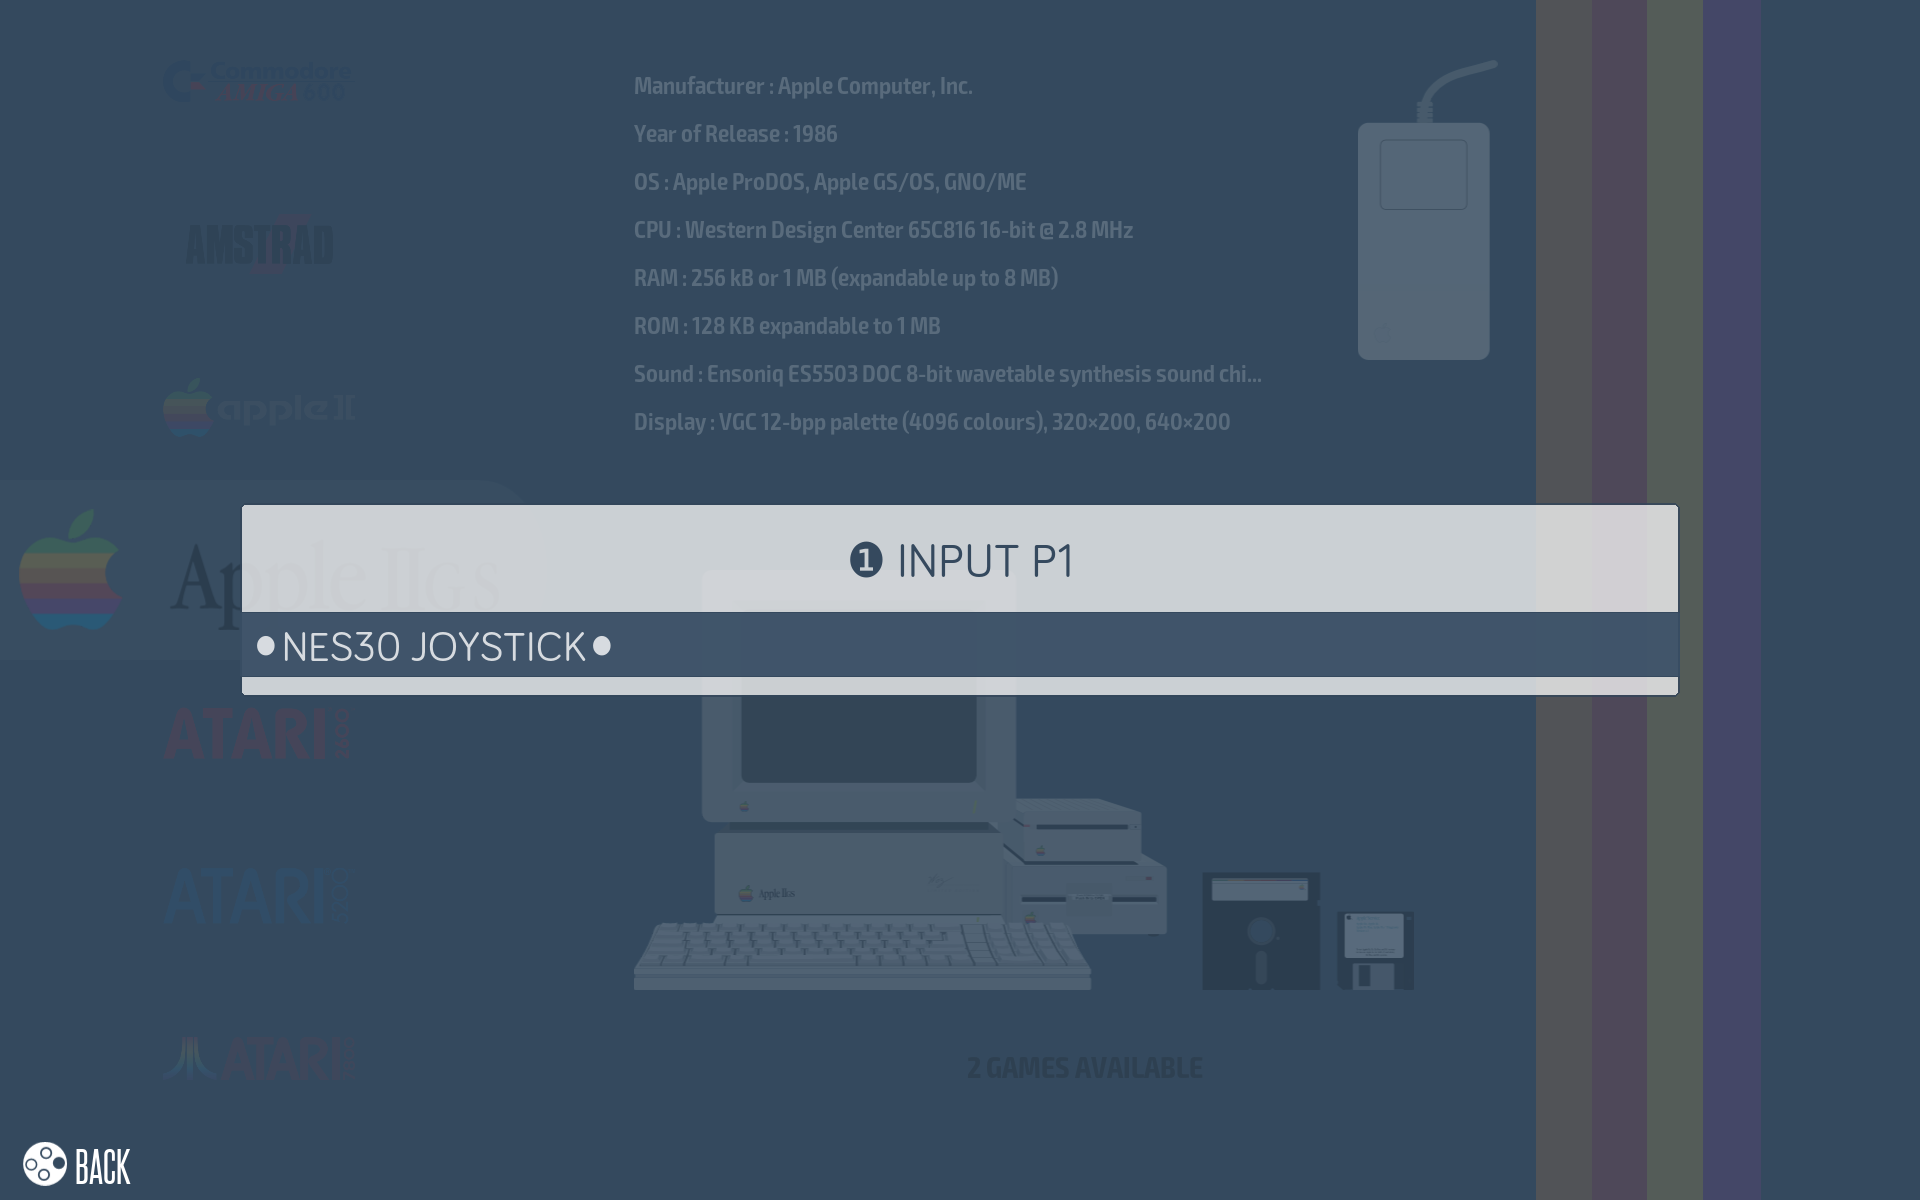
- Your controller is now configured.

¶ Using a keyboard
If you can't configure your controller, you can connect a wired USB keyboard to your Recalbox to configure it. You can find all the key combinations of the keyboard here.
¶ PS3 Controller
To link a PS3 controller:
- First connect the controller to the USB port (via a suitable cable) and wait 10 seconds.
- After that, you can disconnect the controller and press the PS button to start the wireless connection.
Note:
For Asian copies of PS3 Dualshock 3 (like GASIA or SHANWAN), you will need to adjust some settings.
Warning :
If you have any doubts about the power supply and power consumption, it is better to avoid loading the PS3 controller on the Raspberry Pi because it can cause stability problems.Please connect the controller to the Raspberry Pi only to associate your controller with your Recalbox.
If you understand the settings involved or want to use your controller with a USB connection, you need to disable the PS3 bluetooth driver in recalbox.conf by finding and editing the line controllers.ps3.enabled=0.
Remember that the controller configuration in Recalbox is based on the SNES button configuration:
| PS3 controller | SNES controller |
|---|---|
| X | B |
| ◯ | A |
| ⬜ | Y |
| △ | X |
Information:
By default, HOTKEY is associated with the PS button (the one in the middle of the joystick).
For more information on HOTKEY, see the special-commands page.
¶ Xbox 360 controller
Note:
Xbox 360 wireless controllers need a specific wireless receiver dongle.
Remember that the controller configuration in Recalbox is based on the SNES button configuration:
| Xbox 360 Controller | SNES Controller |
|---|---|
| A | B |
| B | A |
| X | Y |
| Y | X |
Information :
By default, HOTKEY is associated with the HOME button (the one in the middle of the joystick).
For more information on HOTKEY, see the special-commands page.
¶ Add a Bluetooth controller
To add a Bluetooth controller:
- Put your controller in pairing mode.
- Then press
STARTand chooseCONTROLLER SETTINGS. - Then
PAIR A BLUETOOTH CONTROLLER.
A list of detected handsets appears!
- Just select yours and your controller is paired.
- You can now proceed to the configuration (if the controller is not already supported by Recalbox).
Information:
For 8bitdo controllers, please see the 8bitdo on Recalbox page.
¶ GPIO controller
You can connect your arcade buttons and joysticks directly to the Raspberry Pi's GPIOs (see the page GPI controllers). You can also connect original controllers from PSOne, Nes, Snes, Megradrive, ... (see DB9 controllers and Gamecon controllers).
¶ Virtual controllers
Virtuals controllers are not accessible on Raspberry Pi0 et Pi1 by default.
With the Miroof Virtual Gamepads project, you can add up to 4 controllers with your smartphones/tablets !
To do this, start your smartphone's web browser and type the IP address of your Recalbox followed by the communication port (port :8080).
Information:
You can find the IP address of your Recalbox in theNETWORK OPTIONSmenu.
¶ Using external storage
Information:
You can very easily use a USB storage device (USB key, external self-powered hard drive etc.) to store your roms, personal files etc...With this method, the system (on the SD card) and the share partition (on the device) are separated.
So if you were to reinstall your system, you would keep all your user data.
All you have to do then is connect your device to your Recalbox, then select it in the system, and play.
¶ The format of your media
First, you must use a device that uses the following file system: FAT32, EXFAT, EXT4 or NTFS.
Note:
It is highly recommended to use the EXFAT file system.
Caution:
Transfer rates can be slow** in the case of NTFS.
Also be sure that the file system you choose is compatible with your PC's operating system.
| Formats | Maximum Volume Size | Maximum File Size | Maximum Number of Files | Read/Write Mode |
|---|---|---|---|---|
| Fat | 2Tio | 4Gio (4.2949GB) | Greater than 250 million | Windows: ✅ Linux: ✅ |
| NTFS | 256Tb (2,815.8492TB) | 16Tb (17.5921TB) | 4,294,967,295 | Windows: ✅ Linux: ✅ |
| exFAT | 128Pio (144,115,1880TB) | 128Pio (144,115,1880TB) | 2,796,202 per directory | Windows: ✅ Linux: ✅ |
| Ext4 | 1 Eio (1,152,921.5046TB - limited to 16Tio per e2fsprogs) | 16Tio (17,5921TB) | 4 billion | Windows : ❌ Read/Write via ext2fsd Linux : ✅ |
Caution
Recalbox will not format your device, it will only create new files on it.
¶ Configuration
To configure Recalbox to use an additional USB storage device.
- Turn on your Recalbox until you reach the usual interface.
- Plug your device into your Recalbox.
- A message will appear asking you what to do with your newly connected device. Select
INITIALIZE. - Recalbox will create the ROM tree structure (and only ROMs) on your storage device.
- Once the end message is visible, you can unplug it and put your ROMs on it.
¶ Troubleshooting
¶ Invisible hard disk
What to do if after reboot, Recalbox still does not see the hard disk?
Information:
Sometimes, after selecting the device in EmulationStation and rebooting, Recalbox fails to create the file system on it. It continues to use the files on the SD card. This happens especially with some hard drives that are slow to initialize.
What you can do:
- Connect via SSH
- Mount the boot partition as read/write.
- Type the following commands:
cd /bootandnano recalbox-boot.conf. - Add this line
sharewait=30. This value is in seconds. - Save with
Ctrl+X,Y,Enter. - Type
rebootand confirm to restart Recalbox.
¶ Network
¶ Configure via RJ45 cable
- Connect your RJ45 cable to your Recalbox and that's it, your Recalbox is configured.
¶ Configure Wifi
- In the general interface, press
Start>NETWORK OPTIONS. To enable, set theENABLE WIFIoption to On. - You must now configure the wifi via WPS. On your Internet box, you must have a button on the modem or in the interface of your modem to activate the WPS function. Once pressed, it remains activated for 2 minutes.
- Still in Recalbox, select
WPS CONNECTIONat the bottom of the menu. This will attempt to find all existing and activated WPS connections around it. - Once your connection is found, it will be automatically saved in your Recalbox.